Search This Blog

Friday 30 December 2011

Making your own microscope

Robert Hooke's 1665 microscope only
had a single lens

If you do a web search on <USB microscope> (leave out the "angle brackets"), and dig around, you will find instructions for making a simple 'microscope' from a webcam that plugs into a computer. Be warned that you need to be fairly handy with tools and a soldering iron to try this sort of thing. You might be better off looking around for one of the cheap models that is available, like the one I showed a while back.

Remember that good work can be done with just a single lens. Anton van Leeuwenhoek did amazing work in the 1600s with single lenses, and the tradition continues. Try a web search on <water drop microscope> and discover some neat designs for one-lens microscopes. Or read this, which appeared first in Charles Dickens' Household Words and then was reprinted in Scientific American, November 4, 1854, p. 64. Maybe you can see how to make such a "microscope" yourself.
 There is a man who sometimes stands in Leicester square, London, who sells microscopes at one penny each. They are made of a common pill-box; the bottom taken out, and a piece of window glass substituted; a small hole is bored in the lid, and therein is placed, a lens, the whole apparatus being painted black.
Upon looking through one of these microscopes, I was surprised to find hundreds of creatures, apparently the size of earthworms, swimming about in all directions yet on the object glass nothing could be seen but the small speck of flour and water, conveyed there on the end of a lucifer match, from a common inkstand, which was nearly full of this vivified paste.
I bought several of these microscopes, determined to find out how all this could be done for a penny. An eminent microscopist examined them, and found that the magnifying power was 20 diameter. The cost of a lens made of glass of such power would be from 3s. to 4s. how, then, could the whole apparatus be made for a penny?
A penknife revealed the mystery. The pill-box was cut in two, and then it appeared that the lens was made of Canada balsam, a transparent gum. The balsam had been very cleverly dropped into the eye-hole of the pill-box. It then assumed the proper size and transparency of a well-ground lens. Our ingenious lens maker informed me that he had been selling these microscopes for fifteen years, and that he and his family conjointly made them. One child cut the pillbox, another the cap, another put them together, his wife painted them black, and he made the lens.
It all sounds too easy, doesn't it? I suspect the man in Leicester Square and his family may have had a great deal of practice!

Coming up early next year: looking at a feather and comparing sand samples from different sources. I have been distracted because I needed to buy an Android tablet for my writing work, and I have started playing with it in a serious way.  The writerly side of me may look at the many meanings of table and tablet at some stage.

Thursday 22 December 2011

Closed for Christmas

That's it.  I'll be back around December 28.

I'll be off out in the bush, looking for beasties like this.

Go on, get away from the computer and get outside as well!

And seasonal greetings for whatever season you are currently choosing to celebrate.

Tuesday 20 December 2011

A plankton net for collecting small animals

You can catch lots of interesting small water life by dragging a bucket on a rope though water weeds and then filtering the results.  A piece of ordinary denim makes an excellent filter, as you can learn if you Google <copepods denim cholera>.  Once you have filtered the water, wash your "catch" into a clear container and hold it up to the light.  use an eye dropper, a Pasteur pipette or a modified wash bottle to extract animals from the sample.

If there are no water weeds, you will need a net.  Even a home-made plankton net can sample small animals at or near the surface of the water.

The main parts are a towing line to pull the net along, a swivel at the net end of the line to stop the line kinking as the net spins while it is being pulled, a stiff hoop to hold the net open, a very fine net (think about what you have in the scraps basket at home), three lines attaching the hoop to the swivel and a small glass bottle which attaches to the lower end of the net, a metre or so beyond the towing ring.

You can buy a swivel from any fishing equipment shop. The hoop can be a length of coat hanger wire, bent in a circle, the mesh can be the footless leg of a stocking, either stitched or stapled over the hoop, or even glued to the hoop with contact adhesive (wear gloves and work outdoors to avoid the fumes if you use this glue). A stapled net won't last as long, but it's easier to make.

As you pull the net along, any animals trapped in the open mouth will be pushed down to the end, where they will be largely protected from damage by the still water in the glass bottle. You can buy nets like this for a high price, or you can make your own very cheaply.

The towing line can be a fishing line: I have used a fishing rod to haul a net like this through the water while walking along a wharf or jetty (the rod stops the net from snagging on the pilings), or you can tow one from a boat which is being pulled along by a 2 hp motor.

If possible, fix the bottle to the net by attaching a metal or plastic screw lid at the narrow end of the net, so you can change bottles regularly, just by unscrewing them. That lid will need a hole in it, but if you use a standard jar, you can have plenty of spare lids. Otherwise, tie string around the stocking and the bottle, and pull it very tight.

With a suitable net, you can explore the plankton types and densities over a time period: either looking for daily patterns, or monthly patterns (some plankton may respond to the full moon, so samples taken regularly at 9 pm could be useful). Maybe there are patterns you can see as the seasons change.

Nets like this can also be hauled through seaweed and water weed to sample the small animals living on those plants. This is likely to damage the net, so use a replaceable but strong one.

You could also just explore the types of plankton found in one place, or compare different environments at more or less the same time of day, over a period of time, to see whether any observed differences continue over long periods. Aside from that, you have the tool, you have some ways of using it, so go for it, remembering that the most interesting questions are always your own questions!

The origins of the towing net

Nobody knows now who was the first to develop this handy item. John Macgillivray, writing in the 1850s, thought it worth explaining how one was made, so maybe the idea was new back then:
Not having seen a description of this useful instrument, I may mention that the kind used by Mr. Huxley and myself, consisted of a bag of bunting (used for flags) two feet deep, the mouth of which is sewn round a wooden hoop fourteen inches in diameter; three pieces of cord, a foot and a half long, are secured to the hoop at equal intervals and have their ends tied together. When in use the net is towed astern, clear of the ship's wake, by a stout cord secured to one of the quarter-boats or held in the hand. The scope of line required is regulated by the speed of the vessel at the time, and the amount of strain caused by the partially submerged net.
—John Macgillivray, Narrative of the Voyage of H. M. S. Rattlesnake, vol. 1, chapter 1.
Or maybe it was only new to Macgillivray.  As early as 1768, Joseph Banks makes mention of using both a "cast net", and when that was lost overboard, he attached a hoop net to a fishing rod. Perhaps this was just dipped into the water, but the idea of towing a net seems obvious enough. Like a lot of simple ideas, most people probably thought it not worth mentioning or explaining!

Sunday 18 December 2011

Slowing small water animals down

Well, as promised, here are some notes on getting to actually see live animals in a well slide like the one on the right. This is a standard glass microscope slide, 3" x 1" (75 x 25 mm), but with a small depression cut into it, so that a cover slip can lie flat on the slide, even when a large-ish (1 mm or so) animal is there is a wet mount.

The problem is that live animals swim around and go out of the field. They also go up and down and go out of focus.  That means you need to slow them down.

The three main ways of slowing animals down are:

* to put barriers in the way, so the animal can still move as fast, but not as far;

* putting the animal in a more viscous (sticky) solution which usually kills them in the end; or

* kill them outright.

The most common barriers are bits and pieces of cotton wool or ground-up face tissues. This is not very effective with anything smaller than a mosquito wriggler, but it's better than nothing.

Live specimens can be mounted successfully in ®Gurr's Water Mounting Medium, which slows them down (and kills them). I have been using the same bottle of this product for almost 40 years, and it seems to be hard to buy nowadays, though it is still mentioned by professional scientists.

A solution of 10 g of methyl cellulose in 90 mL water forms a syrup that will slow most animals down for microscopic examination, while allowing observation of movements of the gut, breathing tubes, and so on. You can buy methyl cellulose at hardware shops, though you may also get it at health food shops, where you will probably pay a lot more for it. Be careful not to get it in your eyes or on your skin.

I haven't tried this, but I'm told you can also add 2-3 grams of gelatin to 100 mL of cold water and heat this while stirring. Cool the gelatin solution back to room temperature and add one drop of pond water to one drop of gelatin solution.

If you mount the animals in 70% alcohol, this will kill them, but a 1% solution of magnesium sulfate (often sold as "Epsom salts") will just anaesthetise them. Note that 1% here means 1% by weight or one gram in 100 mL of water. Put a drop of this on the slide and then use a camel hair brush to add the animal.

Just a reminder for those coming in late: the material I am posting here is made up of out-takes from an upcoming book Australian Backyard Naturalist, due out in May 2012. This is the stuff that won't be there.

Next time, I will look at catching nematode worms.

Saturday 17 December 2011

Small water animals

This entry is about the small crustaceans we call water fleas, because they are about the size of fleas, and they live in water.

Water fleas at a glance

These animals may be flea-sized, but they are actually crustaceans, distant relatives of crabs, prawns and slaters. The ones you are most likely to see are Daphnia, Cypris and Cyclops, but you never know your luck! They move differently, but you need at least a hand lens to see any details, and they are excellent for low-power microscopy.

Technically, they are all branchiopods (not to be confused with brachiopods!). Daphnia are in the sub-order Cladocera, the similar looking Cypris is in the Ostracoda, and Cyclops is in the Copepoda, so you may need to look up cladocerans, ostracods and copepods to find them on the web. The copepods are much less flea-like.

Branchiopds are easy to collect, because they will be found in most bodies of water, and they are just as easy to cultivate. They also have some interesting biology: the Cyclops that you see here is carrying two egg sacs, and you can often see eggs inside Daphnia.

I want to begin, though, with an odd discovery about branchiopods. It was made by Jacques Loeb, a German-born physiologist who moved to America. Loeb made some important discoveries on how animals respond to stimuli, and also did some useful work in embryology. He never explained how he made this discovery, but it must surely have been during a laboratory party!
The writer found that certain freshwater crustaceans, namely Californian species of Daphnia, copepods, and Gammarus when indifferent to light can be made intensely positively heliotropic by adding some acid to the fresh water, especially the weak acid CO2. When carbonated water (or beer) to the extent of about 5 c.c. or 10 c.c. is slowly and carefully added to 50 c.c. of fresh water containing these Daphnia, the animals will become intensely positive and will collect in a dense cluster on the window side of the dish. Stronger acids act in the same way but the animals are likely to die quickly. . . Alcohols act in the same way. In the case of Gammarus the positive heliotropism lasts only a few seconds, while in Daphnia it lasts from 10 to 50 minutes and can be renewed by the further careful addition of some CO2.
— Jacques Loeb, Forced Movements, Tropisms, & Animal Conduct, Dover edition of 1973, pp. 113–114.
In the passage above, 'heliotropism' means "moving towards the sun". People now prefer to say 'phototropism', meaning "moving towards the light", instead. Strictly, heliotropism means "moving towards or away from the light", which is why Loeb speaks of a "positive heliotropism” to show that the animals moved towards the light. Negative heliotropism would involve a movement away from the sun.

Today, we can see the logic of the animals' reaction: high CO2 means less oxygen, so moving towards the light usually means moving upwards and getting closer to the oxygen-rich surface layers of the water.

As a rule, when you are cultivating water animals in bottles, leave the water level far enough down to keep the surface area large. This maintains oxygen levels.  On the other hand, if you want to collect animals to look at, fill the bottle almost to the top, and within 24 hours, most of the small crustaceans will be in the top centimetre or so.

The tiny crustaceans (which is what they are) thrive wherever there is food, so green water from a pond will usually have some, but puddles, horse troughs (if they still have those where you live) and so on are also worth trying. Now for the rest of this, I am going to call them all Daphnia. At its simplest level, half-fill a bottle with green water, add a pinch of all-purpose fertiliser, cover it to stop mosquitoes getting in or water flowing out too messily if it tips over, and leave the bottle in the sun for a week or so.

The best bottles to use for this are 2-litre (or larger) PET plastic fruit-juice bottles, with the labels scrubbed off.  PET plastic is clear, so you will be able to see the animals if they are there. They show up best when you stand the bottle on a table in sunlight, crouch down and look towards the sun, especially near the top of the water and loom for small dots that are moving around near the surface.

As a general rule, that is all you need to do.  On the other hand, some professional biologists prefer to feed their Daphnia on small amounts of brewer's yeast, so the choice is yours. The golden rule is to have several cultures of anything precious, and to feed them at different times. That way, if the yeast takes over, you will have other cultures to fall back on, though usually, if a 'dead' culture is left for a while, there will be eggs, spores or survivors which will bounce back.

The best way to breed large numbers of Daphnia quickly is to take some water from a murky green aquarium, without any filamentous algae. Add a small amount of hard-boiled egg yolk, mixed with water into a sort of soup, and stand back! Any Daphnia that you picked up with the algae will start to breed very rapidly.

In stagnant water, Daphnia develop more haemoglobin, up to ten times as much as in water with plenty of oxygen, so the Daphnia from stagnant water can be quite pink in colour. See if you can observe this.

To look at these animals under the microscope, you need well slides, and you need some method of slowing the animals down, so they don't whizz out of sight.  I will talk about that next time.

Wednesday 14 December 2011

Stains in microscopy

This is probably the most technical and difficult section in this blog (and also the least illustrated). If you are not planning to cut thin sections and stain them, skip over this.  If you persevere, pay close attention to the safety messages.

Most of the things inside a cell are transparent, so it is hard to see any detail. A dye that attaches to one kind of cell part makes it show up more clearly, and we call that dye a stain.

There is a catch, because dyes often cause difficulties with authorities like parents, landlords (or landladies) and the like. These stains can easily stain baths, basins, carpets. people and pets—among other things. More importantly, while pale and colourless chemicals can also be dangerous, you are usually wise to assume that coloured chemicals are always dangerous. Any chemical which attaches to a biological molecule inside a cell (as stains do) is likely to cause damage in the cells that are attacked. Treat all biological stains as dangerous, to be on the safe side.

That means you need to discover the MSDS, the Material Safety Data Sheet. These are easy to find on the web by searching on <(name of chemical) MSDS>. Some MSDS sheets are hard to understand, but the ones at http://msds.chem.ox.ac.uk/ are reliable and clear. Try searching <methyl cellulose MSDS> for practice.

We are forever learning new things, and while methylene blue is regarded as safe now, that may change. Read the MSDS first, before buying or using any stain! You also need to understand that an MSDS will spell out all the risks: read the MSDS sheets for table sugar (sucrose to chemists), water and table salt (sodium chloride), and you will see how complete and obsessively thorough they are!

To get more information on the web, I suggest a search such as <microscopy stains safe>. Just be careful about what you believe!!

Here are some stains that I regard as fairly safe. Even so, you should handle and mix any stains out of doors in good weather. If the stain comes as a powder, think safety first. When you take the lid off, there is sometimes a puff of dust that you don't want to breathe. Try to choose a day when there is no breeze: if there is a light breeze, stand upwind of the bottle. Never mix stains in high winds. Use gloves, goggles and a face mask, or if possible, buy the stains as solutions.

In this outline, I indicate the uses for which each stain is most often used, but most stains will work on other tissues as well.

Basic fuchsin: used to stain nuclei. Dissolve 0.1 gram of the powder in 150 mL of distilled water and add 1 mL of 70% ethanol.

Eosin Y: used to stain muscle fibres, cytoplasm and collagen. Dissolve 1 gram in 100 mL of tap water.

Methylene blue: used to stain living organisms. Dissolve 1 gram in 100 mL of distilled water and add 0.5 gram sodium chloride. This stain can be obtained as a solution from some pet shops, but it will need to be diluted and may have nasty additives. Remember that this one will stain sinks, basins, baths and toilets—and skin!

Nigrosine: used to stain bacterial spores and capsules. Dissolve 1 gram in 20 mL of water.

You can also experiment with food colourings. Many of these are now accused of being dangerous, even when they are approved for adding to food. Treat them carefully, just in case.

Iodine: this is not the friendliest of materials, but it's the best stain for starch in plant materials. Add iodine crystals to a saturated solution of potassium iodide in water until it is saturated, filter and dilute to a pale golden brown. Check to see if you can buy 'tincture of iodine' from your pharmacist, but it will be expensive, and these days, in Australia at least, you will probably only be able to get it from a specialist pharmacist called a compounding chemist.

Malachite green: is not so safe but it is useful to stain plant cytoplasm. Dissolve 1 gram in 100 mL of tap water. This is available as an anti-fungal solution from aquarium shops, but that solution usually contains formalin, which is really dangerous. Read the label first!

When you come down to it, the staining of thin sections might be Too Much Trouble, so what else can you do?

One easy observation involves the large cells that are found in a layer called the epidermis on a piece of onion.  I touched on that a while back in A bit more about microscopes and hand lenses — and I may get back to it at some stage.


Tuesday 13 December 2011

Normal service will be recommenced shortly

I am on my way back home now, having been across the Tasman, playing with grandchildren, bashing through the very last check of Australian Backyard Naturalist, sent over the seas as a PDF, and in between times, gathering sand samples for further study for that microscopy project on sand.

Sunday 4 December 2011

Using a pooter (or inhalator)

Just a quick one today, because I have been doing a lot of heavy data-shovelling for the gold book.

This is an old-style pooter, which you should avoid like the plague, because it is dangerous.

This dangerous and old-fashioned design used a glass jar, glass tubing and cork.  I was helping at a Cub camp one day, and my task was to look after a hyperactive kid and keep him interested for the day.  I showed him how to find small things and catch them with a glass pooter, and he was delighted.

That was fine—in fact it was in the specs I had been set for him to be delighted, but he set off, whooping and hollering, leaping over rocks with this glass jar and I just knew that he was going to fall and gash himself. He didn't, but I knew I had to do better.

A couple of weeks later, I was running a workshop for teachers at the Australian Museum. It was all about using scrap and junk to do real science, and I showed them where I was at. The second and third pictures show the solution,  My thanks to Carrie Bengston, who drew the third pic.

In a flash. one of the teachers suggested using a film canister for the job.  This was almost twenty years ago, and people used 35 mm film that came in canisters.  For years, I would go to my local photography shop and come home with plentiful supplies.

Digital photography killed the photography shop, and my supply dried up.  I needed a new design that used components that would be available for at least the foreseeable future.

Well, you can see me making (1) the film canister version; and (2) a newer version that is featured in Australian Backyard Naturalist, if you go to the video links given in the last paragraph.  There's nothing special about these designs (except that they work),  But it's how they work that counts. There are four absolute requirements:

(1) You must have a clear container, and
(2) You must have a lid that comes off easily, and
(3) There must be a cloth filter to stop wee beasties entering your throat, and
(4) There must be no breakable parts.

The two designs you see in the video meet all of those criteria. Look at the video, then come up with your own design.

The don'ts:

* Don't pooter up ants, because they make formic acid, which burns the throat;

* Don't pooter up stink bugs (think about it);

* Don't pooter up millipedes, because their secretions may be toxic; and

* Don't even try to pooter things that are bigger than the tube (think about that!).

To get some more information on making pooters, you need to look at a video on pooters that I made for the National Library of Australia.  I actually did three videos, which you can find from here.  (By the way, that was me before I found out that I was in reach of being overweight, and also that I had a genetic predisposition to diabetes.  I didn't need to be told twice, so I now cast a far smaller shadow.)


* * * * * * *
This blog covers quite a few different things, so I tag each post. I also blog about history, and I am currently writing a series of books called Not your usual... and the first two have been published by Five Mile Press, The offcuts appear here with the tag Not Your Usual... . For a taste of Australian tall tales, try the tags Speewah or Crooked Mick.   For a miscellany of oddities, try the tag temporary obsessions. And language us covered under the tags Descants and Curiosities, while stuff about small life is under Wee beasties.


Saturday 3 December 2011

The art of the white dish

Some of the most interesting things to look at are the tiny animals that you will find in any pile of old vegetation, but the trick is to make them show up.  Most small animals are very good at keeping still, because predators are all very good at seeing movement. Prey animals are good at seeing movement, because any moving thing might be a hunter. Our ancestors were probably once both prey and predators, so we have inherited the same ability.

The best way to see life in a rock pool is to sit and watch, but exactly the same method works almost anywhere in nature. Sit still in a tree's shadow on a night with a full moon and you may see possums, bats, birds and more, up in the trees.

Using a white dish makes it even easier to see tiny animals moving. When you pick up some leaves or grass clippings, there may seem to be no life there at all. If you spread the material out on a white surface and wait, you will start to see small animals moving around cautiously, looking for somewhere to hide. You can use white paper for this, but a dish reveals them well and also stops things escaping (except the jumpers!).

You will need either a camel hair brush or some sort of probe (a stick, a piece of wire, an old pen or pencil) to move the litter around. If you do this in strong sunlight or under a bright lamp, any animals you uncover or dislodge will scurry off to the nearest shelter, and you can see the movement.  I use an old white enamel dish, the sort your great-grandmother may have used in the kitchen.


These are heavier than plastic dishes, but they are useful for many things, as you will see above, where it is functioning as a home for ant lions on the left and an algae tank on the right. You can also use the dish, with salt water in it, to shake off the small animals clinging to a piece of seaweed. Fill the dish, swish the seaweed vigorously back and forth in the water, remove it, and look to see what is darting around.

On a side issue, semi-clear 3-litre food boxes make good small tanks. It is easier to see what is in these if you sit the base on a piece of white paper or board.

For land animals, you can turn the dish into a cage, if you use flywire and rubber bands to keep them in the container. Watch out that the contents don't dry out too much.

You can see from this shot how I join rubber bands together and then close the loop with an opened-out paperclip. It is always wise to use two separate sets of bands, just in case one of them fails, and gives the animals a chance to escape, to the annoyance or horror of your family.

Tomorrow, I plan to say something about the pooter (sometimes called an aspirator), and how you can use it.  I won't say a lot, because pooters are still there in  Australian Backyard Naturalist, but there's a video already up on my publisher's website, and I have a bit more to say.

Friday 2 December 2011

The hidden value of performances.

"Those really were two unforgettable hours.  It's been a long time since I've been able to concentrate so well on my problems with arsenophenylglycine.  We'll have to make a small substitution the first thing tomorrow."

That was, according to an article published in New Scientist 22 August 1985, p. 48, the comment made by Paul Ehrlich (1854 - 1915), to his wife as they left the concert hall.  That was my notes say, but in these modern days, you can Google and see the book review that it actually appeared in.

Lehar's bust in the Stadtpark, Vienna, found  while
idly wandering  through there in 2006. The committed
statue photographer can have a great time in Vienna!
Last Tuesday, I was at the last night (in Sydney) of the Australian Ballet's production of The Merry Widow.  I have seen it before, but a month or two back, I saw the Australian Opera's production of the operetta.  
The handy label, set in the lawn nearby for
foolish and confused foreigners who
assume that in Vienna, every statue is
Sigmund Freud, Johann Strauss or Wolfie
Mozart.

While I had seen Franz Lehar's The Merry Widow before in German (in which I have bare survival skills), it was only then that I "got" the  complicated plot line.  The operetta's plot is rather slimmed down in the ballet, so a lot of the Gilbertian foolishness of the operetta is left out, but John Lanchbery's arrangements of Franz Lehar's music are loads of fun, and I thoroughly enjoyed the evening.

But, and I hesitate to confess this, I entered the hall, where we sat in the same subscriber seats that we have had since the Australian Ballet first performed at the Opera House in 1973, with a puzzle in my mind, and I walked out with a new narrative structure for the next book, which I have been researching for some years, gathering the data.

I store all of my research notes, quotes and snippets in a spreadsheet, on which I later play cute tricks to get an order. You can see some of my methodology here, but the main point is that I do free-form fact gathering, chasing interesting bits, and later, I choose from among them, dig some more where I need to, and not long afterwards, the story takes shape. To give you an example, the next book will be perhaps 60,000 words, maybe less, but there are almost 250,000 words in my files at this stage, in about 2800 lines on the spreadsheet (with other sheets in the spreadsheet storing references, image details and other stuff that I will need.  My rule is to over-research, and then pick out the most interesting bits.

This time, though, I had lots of interesting anecdotes but the narrative flow wasn't there. I had sorted everything, but it just didn't gel. But now it has.  It began with something I read, just before we walked down to the Manly ferry, which I told Chris about as we dined in the foyer. It was an October 5, 1851 report in the Sydney Morning Herald about events at Sofala the previous Sunday.  That, I realised, somewhere in Act 2, was the kick-off point, and everything follows from it.

Sand from a Sydney bush track, x10.
This morning, I have been slapping down headings and heading sequences, and it is going to work. I also have in-principle interest from a publisher.

So now I am prepared to come clean, though if you search previous posts carefully enough, I have referred to the idea before, though I was then contemplating a world history—until I saw how big the story was.  Now it will be an Australian story, with many visits to parallels in other times and places.

Sand from a Sydney bush track, x60.
The subject will be gold and gold rushes, which you might have worked out from Sofala, 1851.  It will be a social, a scientific and a technological history, and it will concentrate mainly on the real costs of gold mining.

But the microscopy won't be stopping.  I am still researching the book after that, and that means I will be looking at a lot of sand.  Does that sound mysterious?  If so, good!

To do that sort of work, I think the cheap microscope is going to prove adequate, but it's summer here, and I'm hitting the beaches with clip-lock bags, taking lots of samples to bring home and study.

I'll let you know in a couple of weeks how useful it was, and which lighting proved to be the most useful.

Thursday 1 December 2011

My current writing status

Just turning away, briefly, from microscopy, I am emerging from a hectic period and moving into an intense one.  My sequel to Australian Backyard Explorer, which is, like ABE, directed notionally at ages 10 to 14, and called Australian Backyard Naturalist, has gone to the printer.

The book after that is for the general market, and the working title is Curious Minds. The title is a play on my occasional statement that my friends and my enemies agree, with differing intonations, that I have a curious mind.  It is about the natural historians and natural history painters who were in Australia, mainly between 1688 and 1888.  That is now through editing and on its way to design, so that will generate a few calls on my time.

The next book is a toss-up.  I have two interesting topics: one is just about completely researched and planned out, a fascinating mix of Australian history and lots of science and technology.  The other, less researched but involving a lot more field work, is starting to push ahead.  This is why I am approaching an intense period, because between Christmas and New Year, I plan to start laying down the text of the new book, and I need to be in a position to decide.

Mind you, there are also three series that are in the offing.

I may have mentioned that I never get writer's block: I just shift to another project for a week.

So if I fall silent for the first half of December, I am most probably still on my twig, but I'm cogitating.

Looking at moth scales.


Butterfly and moth wings have no colours in them—or at least there are no pigments. The scales on the wings produce the effect of colour because of the way they catch the light and bend it. If you want to look it up, the process is called birefringence. Even though you will probably want the higher magnification of a monocular microscope, you may need to use reflected light to see any detail.

That is, you may want to try using a bright light above the stage, though the shots above were taken with my good monocular microscope, and at the magnifications marked.

Note that magnifications stated like this are a bit meaningless, because then I make a JPEG, resize it, and you view it at some uncontrolled size on your screen.  To have any meaning, what I need is a scale, and I haven't worked out how to do that.

Anyhow, here's what you need, snapped on the desk where I am now working. You need a microscope (out of shot), slides, cover slips, a piece of black paper, microscopy tools, and one or more dead moths and butterflies.

The best place to collect dead moths is in an exterior light fitting that is on at night.

You need then to scrape some off, add water and make a wet mount of them.

This is easy to say, but harder to do, because sometimes the scales repel water and slide out from under the cover slip. In the end, I took a dead moth, snipped a few pieces of its wing and dropped them into a small specimen tube with a few drops of water and a tiny amount of detergent. This is why the first shot features an annoying air bubble in each magnification. Like life, microscopy often involves trade-offs.


Here are three shots of the main parts of the process of making a slide. I added a bit much water, so I then had to blot the excess away with a face tissue. By the way, I used the black paper for contrast, so I could see the scales on the slide. It's a handy trick to remember.

The slide in these shots gives you a scale of sorts, because it is 25 mm (one inch) from top to bottom.

 These three shots were all taken with the $50 USB microscope which will appear later in this entry.

The first one is at x10, the sort of magnification you get from a normal hand lens, and as you can see, it isn't much use.


Now we are at x60, and like the first shot, this is using transmitted light, which means I have turned on the light under the stage.  Now we can actually see some detail.


Let's move up to x200, the maximum that I can get. It's a bit pale, and the focus control on the cheap microscope leaves a lot to be desired, but hey, what do you want for 50 bucks?


 Anyhow, I decided to try oblique lighting from above, using a little quartz-halogen lamp that sits on my desk.


The lower shot is one of the pictures I took, but I don't think I'm really in control of this method yet. Anyhow, play with it!

Now a note about my first way of getting the scales from the moth's wing: I think the method shown here, where I just rubbed the scales off with a pair if forceps worked best,

I used scissors to cut bits from a wing.

I used the handle of a paint brush to treat the wing pieces roughly, before I fished out the main pieces of wing. Then I stirred the water up a bit and lifted a drop of it to make my slide.

There were only a few scales on the slide, and some of those were broken, but there were enough whole scales to study.

One thing I learned: the scales seem to vary in any one moth, but I don't know whether each type makes a different colour. There's an interesting bit of research for somebody there!

Tuesday 29 November 2011

Looking at pollen grains


What you need:
The first thing you need is a collection of flowers. I use a set of neat little plastic containers that screw together. They are sitting on my desk as I write this, and the top two contain millipedes that I collected this morning, and which may be the basis of a future entry, depending on what I can see.

You really need a microscope with a magnification of x400 or better, and the patience to piece together different views. Pollen grains are too small to see with the eye, or even with a hand lens, but they are too large for you to focus on the whole grain at one time under high power.

That means you need to manipulate the images with a neat bit of open-source software from the National Institutes of Health in the USA, called ImageJ.  This is really neat, but not entirely intuitive to non-geeks, so I really urge you to read the documentation.

Almost every species has a distinctive pollen, and there is even a science of pollen study called palynology. This science is useful in archaeology, criminal investigations—and even in determining the origins of honey.


Here are two shots of the same pollen, one under low power (left) and one under high power (below).  You need to adjust the focus up and down if you want to see the distinctive patterning (called sculpting) on the surface.


The pollen is from a pea, Gompholobium, which was quite infamous in the early days of Australian settlement, because it poisoned sheep which ate it. The poison, sodium fluoroacetate, is used today under the trade name "1080" (ten-eighty) to get rid of pests, because Australia's marsupials are able to resist the poison which is good against rabbits and foxes.


I didn't get very far with this before deciding to drop it from the book, so the lighting in my examples is quite variable, simply because I had lots of stuff to write, and couldn't chase too far down the blind alleys.  I will get back to this, one day, some time. Take these two shots (below) of cobbler's pegs (Bidens sp.) pollen:


In each case, I took three shots at different levels, trying to capture the sculpting. Here is a last example, Kunzea (bachelor's buttons, Myrtaceae).  I'm far from an expert in this, but there's the idea for you.


There are two problems: pollen grains are sometimes hard to wet, so air bubbles cling to them, and once they are wet, some of them will burst, sending out a pollen tube—this is explained in the next section. I use a tiny amount of detergent in the mounting water and that seems to help get rid of the bubbles. To beat the bursting problem, all you can do is work fast.

Professionally, the clearest views come from scanning electron microscopes, but those are a bit more than a private individual can afford. Under x200, you will be able to just make out the 'sculpting' on the surfaces of pollen grains, and you may even be able to see that they are different shapes. Under x400, it will be much easier to see.


Sunday 27 November 2011

And now I am on steam wireless—again

Another side of my persona: aside from wandering in vast wildernesses like that on the right, I am an old educator (well that will come as a complete surprise, I don't think, if you have been reading these pages).  I also write books, and I haunt libraries.

Add to that my long history with computers, which began in 1963 when punched paper tape was a modern form of input.

I am also a former bureaucrat and as a management consultant, spent some time doing fraud investigation, so I have a short patience span when it comes to would-be pole climbers who seek to wreck the status quo, so that they can later point proudly to the carnage and say "I created that."

All of these elements come together in a thoughtful piece that I delivered today on ABC Radio National, called A Question of Collaboration.

For a certain period of time, you will be able to listen to it, and after that, you will be able to read it.

I have made many contributions to Ockham's Razor since 1985, and you can find most of them here.

I can't see any way to attach an mp3 file to this blog, but I will play with it, once iTunes has gathered it in as a podcast.  You can subscribe to the podcasts here.

(Later addendum: I looked too soon—the ABC elves have since added a link so people can download the file.  It will be there until about Christmas day.)

I could do worse than quote from the program's own About Us page:


William of Ockham was an English monk, philosopher, theologian and probable victim of the Black Death, who provided the scientific method with its key principle 700 years ago.


'What can be done with fewer assumptions is done in vain with more,' he said. That is, in explaining any phenomenon, we should use no more explanatory concepts than are absolutely necessary.


Well, for both broadcasting and for science, simplicity should never be despised. Our program, named after William, consists of a short introduction followed by a scripted talk. Just that, week after week.


This program allows thoughtful people to have their say without pesky interviewers interrupting, or someone of opposite views turning the exercise into a joust. There are times when a speaker needs a clear run, some proper control, and this is what Ockham's Razor provides. 


Have a listen or a read, and see what you think.  You need to get to the very end.  In the picture above, Chris snapped me while I was  looking for scorpions on the edge of the Sahara.

By a curious chance, my talk, like a scorpion, has a sting in its tail.

Saturday 26 November 2011

A stand for microscope slides and cover slips

Here's a quick practical idea.

I wash and dry my microscope slides for re-use, and I needed somewhere to dry the slides. I planned to sit them in saw-cuts in a piece of "2x1" (that's "41x19 DAR" to purists), but the saw I was using did not make wide enough cuts for the slides to fit.

So I used panel pins to hold the slides, and the saw cuts hold the cover slips. The pictures tell the story.

In this shot, that's the washing dish at the back. I blot them on the paper towel then leave them in the rack.


Here is the timber on my work bench, with the saw cuts made.


Just for a neater job, I marked up the alignments for the pins and drilled starter holes.


Then I tapped in the pins.


And finished the job.  That meant cutting off the length that was to be the stand: I usually work with a large piece and trim it when I am ready.


Here it is in use, but because I use circular cover slips, I quickly discovered that when I moved my stand, the cover slips rolled out.

Cover slips are thin, very thin—and they crunch under foot.  This was not a Good Thing, so clearly, Something Had To Be Done!  You can sort-of see what I did here.


But it's clearer in the last shot.

Then  I took some scrap plastic from my scrap box (it was part of a no-longer-needed plastic L plate.)  I cut two strips, and glued them along each side with Superglue. The top of each strip is flush with the top of the stand.

(The other solution would have been to get square cover slips, but I already had these.)


And that was that.

Friday 25 November 2011

Hunting the elusive tardigrade

My thanks go here to Dr Sandra Claxton who taught me a great deal about tardigrades (actually, she taught me just about everything I know!)


Occasional and skippable one-paragraph commercial announcement: the microscopy material appearing in this blog at the moment comes from out-takes from an upcoming book.   Once you have read this, you will see why we decided to leave this bit out of Australian Backyard Naturalist (which by the way, you don't need to buy or read to follow any of this).

The thing is, this sort of work is advanced stuff, because these animals aren't easy to find: the biggest tardigrades are 1 mm long, the smallest are only 0.4 mm (400 microns). That means you probably won't see them without a hand lens, and you certainly won't see any real detail without a microscope, but tardigrades are everywhere.

Even under x20 with a dissecting microscope, tardigrades are small wriggly blobs, just visible enough to pick up with a brush or a needle, to transfer onto a well slide.

Under a high-power microscope, you will be able to see that they have eight legs, each one usually ending in a claw: only the soil tardigrades are clawless.


Sometimes, the two hindmost legs may be curled up under the body, but after you have seen a few tardigrades, you will learn to recognise the curved claws on the legs. The individual shown here has its two hind legs almost hidden.

The name 'tardigrade' means 'slow walker', but their common name is 'water bear'. Tardigrades are found almost everywhere, from high mountains to deep in the sea, but the easiest ones to catch are the ones that live on or under the bark of trees or among lichens and mosses. You can also find them in leaf litter sometimes.

Some tardigrades drink the juices from plants, but others are hunters, and experts can tell the hunters at a glance, because they have a big pharynx. Tardigrades eat mosses, fungi, protozoa, nematodes, rotifers and even other tardigrades.

Tardigrades are hard to classify, but they seem to be a sister group to the velvet worms and the arthropods. They have no respiratory organs, because they are small enough just to absorb oxygen through their skins. They have a 'straight-through' digestive system, and under the microscope, you can usually see their digestive glands, but not much else.

What you need:
A tree to scrape bark from, a paint scraper, a jar, a coarse sieve, a fine sieve, a wash bottle (see my last post in this blog) some containers and a dish.

What you do:
Scratch some bark fibres off a tree with the side of the blade of a paint scraper, or gather up some moss or leaf litter. You have probably just collected your first tardigrades. Leave this material to soak in water overnight to knock the tardigrades out.

Summary: sieve the damp bark in a coarse sieve. Wash it with a wash bottle and discard the large stuff in the sieve. Take the material that went through the sieve and run it through a cloth sieve to get rid of fine stuff. The tardigrades and similar-sized fragments are on the cloth and can be washed into a jar.

Run the water and bark through an ordinary kitchen sieve, and catch the water in a jug. The tardigrades will now be in the jug, but separated from the big bits of bark.  Note that my "jug" was an ice cream container.


Leave the jug to stand for 30 to 60 minutes, and then strain the water through a 40 micron mesh. If this is hard to get, use a square of an old silk blouse or even a piece of linen. A piece of stocking or pantihose is too coarse, at around 400 microns, the size of a large tardigrade, but even that will catch some, if it is not stretched too tightly.


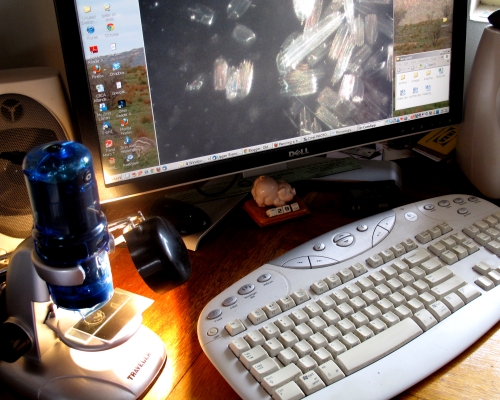
I have a trick for making filters: I use a wood chisel and a hammer to cut out the flat top of a screw cap, in order to make a sieve funnel: look at the picture above, and the one to the left to get the idea, but I will come back to this trick in a later post, because it can be used for all sorts of things.

Note inserted October 2014: that post has finally been written, and is online.

This second stage separates the tardigrades from the really small stuff in the water.


Then you need to wait patiently as the water goes through, leaving a glug of plant fragments and hopefully a few tardigrades on the cloth.  


The end result after straining is complete.


Then you turn the sieve over and run some water the other way, to wash the tardigrades and anything about their size off the sieve and into a small amount of water. The best way to do this is with a wash bottle.


After that, you just need to search carefully through the remnants in a shallow dish, to see what you can spot moving around. Expect to find all sorts of surprises in there, along with the tardigrades, including large protozoa, nematodes and small mites at the very least. Leave the dish completely still and look for any movement in and under the bits of litter and sand grains. At first, you probably won't see the tiny wriggling shapes without a microscope, but once you know what to look for, a good hand lens will reveal the larger tardigrades.

Another way of catching them

A 'Dust Buster' or other portable vacuum cleaner can save you a lot of work. Fit one with a clean bag and use it to sample tree trunks, lichens and moss mats near waterfalls. You can use it to pick up mites, springtails, beetles, flies, bark lice (book lice) and small spiders. Ian Kinchin, who invented this method, said it was particularly useful on tardigrades.

You need to have a white dish or ice cream container, large enough to let you shake the vacuum cleaner bag into it, banging it with your hand to shake off any small passengers that are hanging on. Then tip the contents of the dish into a holding jar.

In my attempts so far, I think I have used moss that was too dry, so I only got small numbers of mites from the moss. One day, I plan to try two things: first, I want to choose a moss mat and clean it of all twigs, and then 'vacuum' it after rain; second, I want to try watering a moss mat with bottles of water, waiting a few minutes and then 'vacuuming' it. One day, maybe, but you can always beat me to it: if you do, please post a comment here.

Tardigrades are tough! You can find them 6000 metres up mountains and 4000 metres down in the oceans, and on the ground, all the way from the poles to the equator. They can survive being frozen below -200° C for several days, they thrive in boiling hot springs and they can even be heated to 151° C for several minutes. They can also live for a century without water, and for longish periods without oxygen, even in a vacuum, and they can survive huge doses of radiation. People used to say that after a nuclear war, only cockroaches would be alive, but the tardigrades will do even better!

And the moss mat flushing method


Seen at close range, a moss mat offers lots of handy hiding places for small life forms.

In a very real sense (as you will see, once you think about scales), the moss mat is a sort of uniform jungle, though the shot on the right also shows a couple of capsules, the devices from which mosses release spores that can blow around and carry the moss genes to a new place.


In many places, like this bare sandstone slab, to the north of Sydney, a moss mat may be the only cover around. There will be something living there, though probably not much.  Moss growing near a stream or a waterfall or even in a damp alley is a better source.

To catch them, you need a good light source, a Petri dish or a saucer, some moss and some water and/or 70% alcohol. I prefer using just water, so the animals live and I can release them later. The alcohol would kill them.

If you slowly add water to a moss mat in a bowl, some of the animals will climb up into the dry. Adding 70% alcohol with an eye dropper has the same effect, but you need to watch out for fire, and avoid breathing the fumes.* Do this in a flat white dish in the open, pick up the animals with an eye-dropper, and put them in a large amount of fresh sea water to reduce the risk to them—and you!

Remember that tweezers are bad news for animals. You should use a paint brush to pick up any animals you want to mount on a slide for closer examination, and always use well slides to avoid crushing the animals.

If you look carefully, I am told, there may even be tardigrades, but it hasn't happened for me yet.
___________

* By the way, a small amount of methylated spirits in some sea water will flush all sorts of animals out of dried seaweed on a beach.  I will come to that, some other time.

References

(started April 2015)
My thanks to Thomas Boothby (see comments below) who drew my attention to ISTH, the International Society of Tardigrade Hunters. This is an excellent place to go, and you will get real experts there, as opposed to this fumbling enthusiast.

* * * * * * *
This blog covers quite a few different things, so I tag each post. I also blog about history, and I am currently writing a series of books called Not your usual... and the first two have been accepted by Five Mile Press, The offcuts appear here with the tag Not Your Usual... . For a taste of Australian tall tales, try the tags Speewah or Crooked Mick.   For a miscellany of oddities, try the tag temporary obsessions. And language is covered under the tags Descants and Curiosities, while stuff about small life is under Wee beasties.


Making a wash bottle

I know I said I would do tardigrades next, but for that, you need a wash bottle.  You can buy one (hard to find but expensive) or you can make one—and the design adapts to make a water sampler bottle as well. A wash bottle can squirt upwards to flush material out of upside-down sieves and containers.

The easy way to get one is to take either a drink bottle or a detergent bottle with a 'pop-up' lid and use that, as is. You can use these to squirt upwards or downwards, but it's messy, and if you want a gentle and controllable water flow, you need a proper wash bottle.

You will need a soft plastic bottle (I use a one-litre milk bottle) with a screw-top lid, about 30 cm of 3 mm (internal diameter) plastic tubing, a drill with a bit about the same size as the tubing, some thin iron wire, some gaffer tape (that's duct tape if you are American) and a safe place to use the drill.

The tubing has to reach the bottom of the bottle inside, and come part of the way down on the outside, as you can see from the third picture, so work out the length you need for your bottle. Choose a drill bit that makes a tight hole for your tubing: I use a 13/64" (5 mm) drill bit, but you need to test this for your tubing. Use an old cap and drill several test holes to choose the right size that gives a tight fit.
The wash bottle looks like this when it is assembled.

Then take the cap off the bottle, drill a single hole in it and feed the tubing through the hole until there is enough to reach the bottom of the bottle.

After you have fitted the cap onto the bottle, wind a piece of wire around the tubing so the tubing will take and hold whatever shape you give it. Then cover the sharp ends of the wire with gaffer tape, add water to the bottle, and you are ready to go. You can also use a small amount of tape around the tubing to make a tighter fit where it goes through the cap: this trick also works for pooters.

The wash bottle, ready to use.
(Pooters are in the book, so I won't be describing those here, but I have covered them elsewhere.  Look around and you may find me.  If that seems too hard, try this Youtube clip, posted by my publisher.)

Still with me?  Good.

You can adapt the same design to make a water sampler bottle. I will cover this briefly, because you can experiment with this yourself.

You don't want the water coming out when you squeeze, so if you are holding the bottle right-way-up there should only be a short length of tube inside the bottle. You can also use a long tube attached to a stick to draw up samples from deeper water, but remember to squeeze the bottle before you put the tube in the water, so bubbles don't chase off the wildlife or stir up the sediment too much.

With a bit of thought, you can probably use the same design for a simple one-tube pooter for catching ants.  You need a fairly tight seal where the tube goes through the bottle cap, and I sometimes use epoxy resin glue to seal the tube in place. I advise you to get adult help to experiment with epoxy resin. Work outside, don't breathe the fumes, and try not to get it on your skin. Epoxy resin isn't that dangerous, but play safe!

And now we are ready to tackle the tardigrades.  Next post, I promise!